When you first start using Microsoft Project, it can be really overwhelming. There are so many things to click and so many views. But all you want to do is create your first project.
Let me give you an overview of the workspace and navigation bar. You’ll be much more comfortable with the app once you understand how to navigate the workspace.
I’m using MS Project 2016 for this tutorial.
The navigation bar
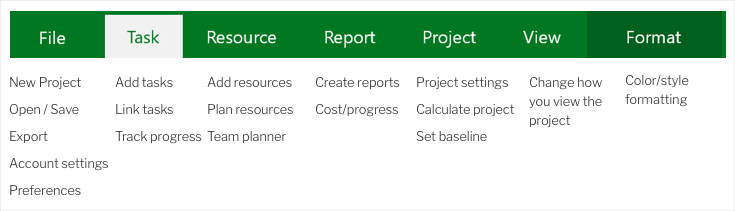
At the top of the screen you’ll see the green navigation bar. I added under each tab the functions most important for you.
For example under the Task tab you can create tasks or link them and you can also track task progress. Under the Project tab you can change project settings or calculate the project, but you can also set the baseline:
Let’s look at each tab separately:
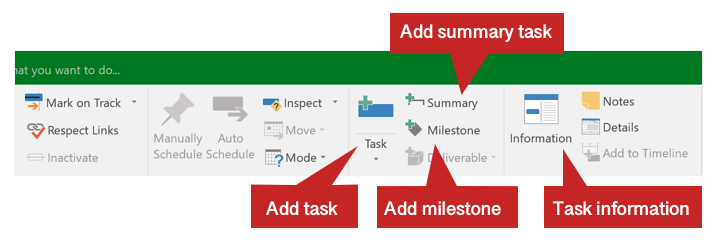
The Task tab: Maintaining project tasks
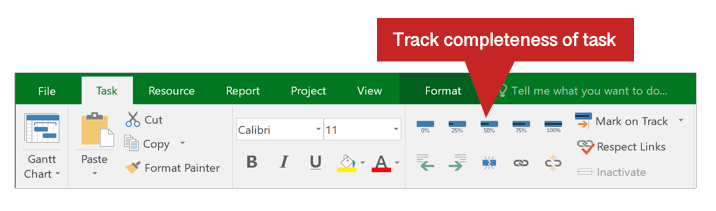
The Task tab contains functionality to add or change project tasks. An example of a task would be ‘Hold team workshop’ or ‘Create project budget’. You can also track the progress of tasks by setting the completeness indicator to whatever percentage — for example 30% complete or 50% complete.
Task tab – left side:
Task tab – right side:
Here’s how you can add tasks, milestones or summary tasks. Under the Information button you can make advanced task settings.
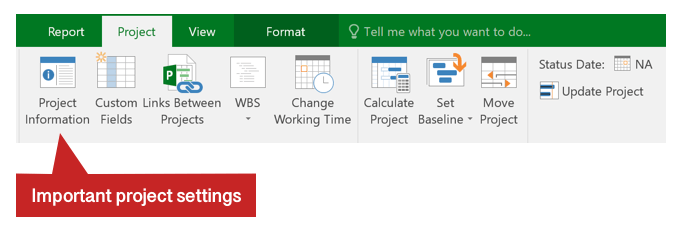
Project tab: Settings affecting the entire project
Here you find settings and functionality that apply to the entire project. Typically you only go there when creating a project in MS Project. And maybe later if you want to calculate the cost and effort. There’s also a function for setting the baseline:
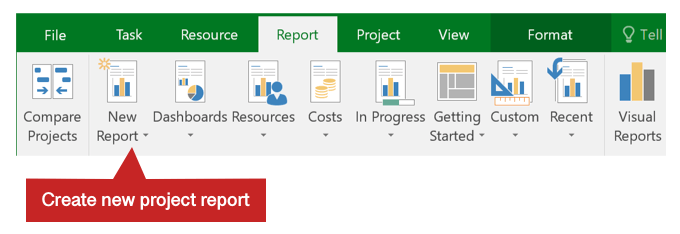
The Report tab: Create project reports
From time to time you’ll want to create project reports. Either for yourself or for your management. Then this is the tab to look at. You can create custom reports showing the cost, effort and progress. Visual reports are great for including in management presentations.
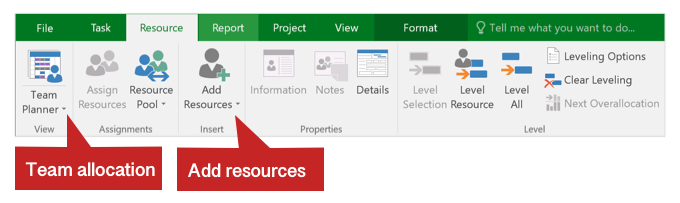
The Resource tab: Manage and plan project resources
You can (but don’t have to) plan resources in Microsoft Project. Resources are usually your team members. But you could also maintain machinery, hardware or other tools as resources that can be used by the project.
The benefit of using resources in MS Project is to reconcile your resource requirements with the availability.
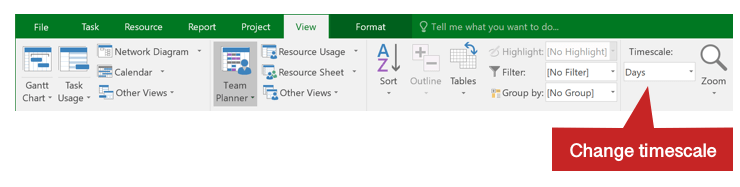
The View tab: Different ways to look at your project
You can take different angles to look at your project: For example you can look at the task status or the Gantt view. You can also at the status and usage of project resources.
From the View tab you can easily jump to a different view and get to the data you want to see in a specific situation.
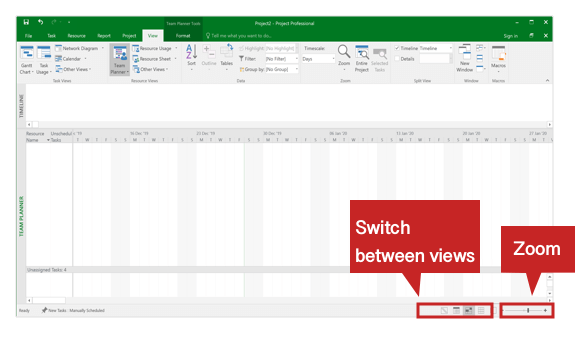
Switching between views
These buttons can be easily overseen: At the bottom right corner for the MS Project workspace there are two sets of buttons which are super helpful. There’s an icon bar which allows you to quickly switch views. Then there’s the zoom bar where you can change the timescale of the project timeline.
Try playing around with these buttons so you understand their purpose.
Video: Navigate the MS Project Workspace
Ready to create your first project?
I hope you found this overview helpful. Once you’re ready, let’s create your first project in Microsoft Project.