You probably noticed:
Microsoft Project assumes a 5-day work week, ranging from Monday to Friday. However this type of schedule is not appropriate for every project.
If working within an industry such as construction or manufacturing, you would know that this pattern of work is not the norm, instead using a 7-day schedule. This means that every day of the week, including Saturday and Sunday, is seen as a working day and therefore is used to work toward project task completion.
Project’s default setting of 5-day workweeks may therefore be frustrating if you are looking to plan your project using calendar days and may leave you thinking “How on earth do I solve this problem?”. There are however ways in which the project calendar can be changed to suit a project undertaking work 7-days a week.
The use of Microsoft Project (click for more guides) is therefore appropriate for projects with both types of calendar. It is simply a matter of understanding how the project calendar can be changed.
Setting up a 7 day work week in Microsoft Project
In order to alter the number of days you wish to include within your project’s working week, there are a number of steps you must follow. Below I have outlined the steps required to set up a 7-day working calendar within Project, including illustrative images in order to assist you.
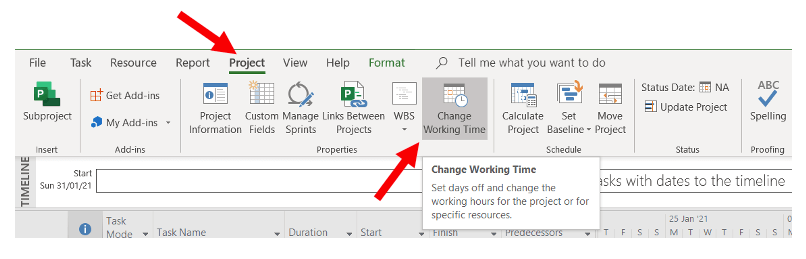
Step 1: Using the tabs ribbon at the top of the screen, select Project > Change Working Time:
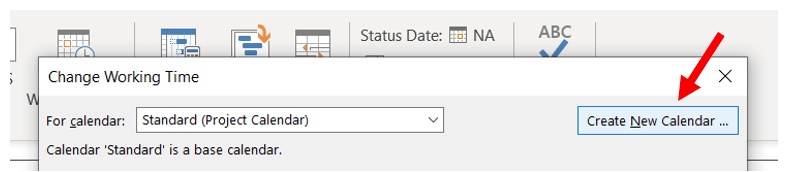
Step 2: Within the Change Working Time window, select Create New Calendar:
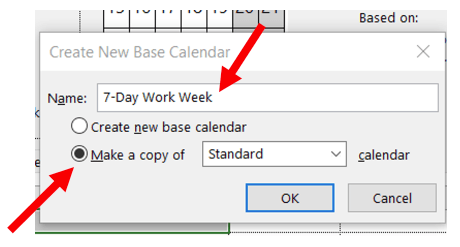
Step 3: Name your new calendar and select “Make a copy of”, ensuring to select “Standard” from the drop-down list. Press OK.
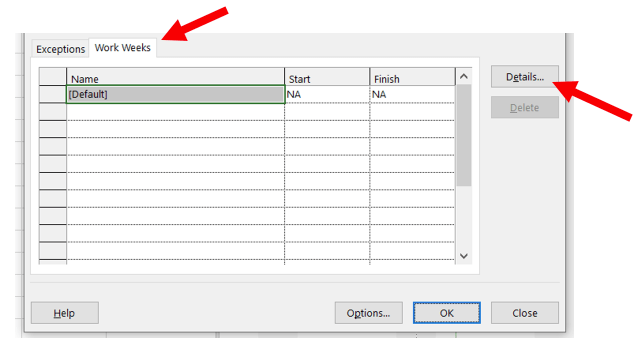
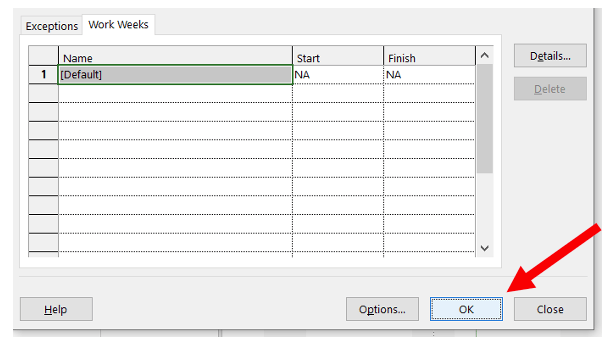
Step 4: While still within the “Change Working Times” window, select the “Work Weeks” tab then select “Details”
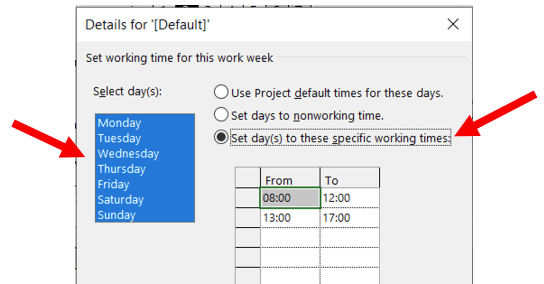
Step 5: Select all 7 days in the table before selecting “Set day(s) to these specific working times”:
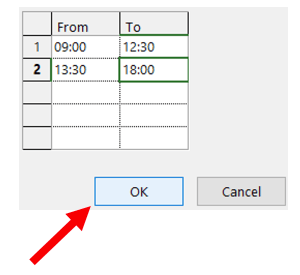
Step 6: Change the “From” and “To” times to indicate the daily working hours required by your project, taking into consideration any necessary breaks (for the purpose of this example I have indicated that the daily working hours will be from 09:00-12:30 and 13:30-18:00 allowing for a one-hour lunch break from 12:30 to 13:30).
Step 7: Select “OK” to exit the “Default” window and “OK” again to exit the “Change Working Time” window.
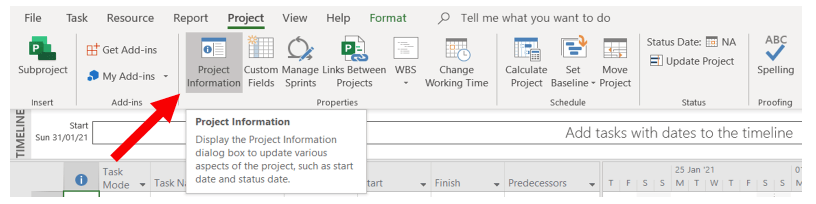
Step 8: Once again using the tabs ribbon at the top of the screen, select Project > Project Information:
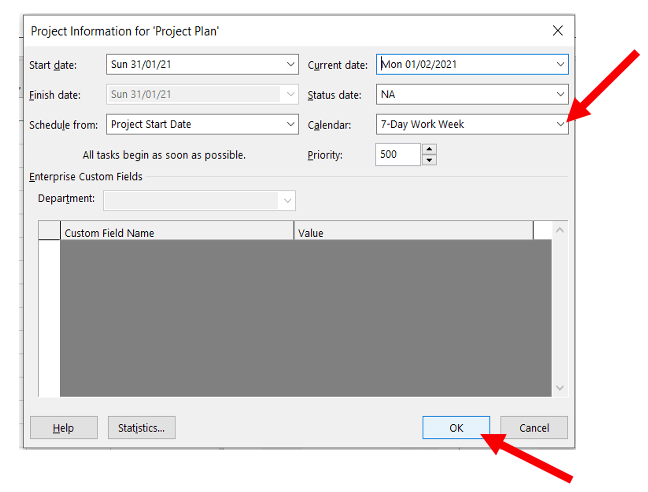
Step 9: Using the drop-down menu, change your custom calendar from “Standard” to your new 7-day calendar. Select “OK”.
Step 10: It is also important to ensure the project timescale is working to the correct calendar. To do this, select “View” on the tabs ribbon then select “Timescale” from the drop-down menu as shown below.

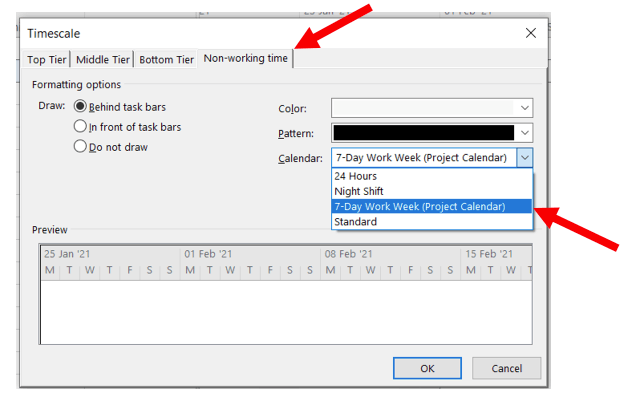
Step 11: Select the “Non-working time” tab before selecting your custom 7-day work week calendar as your chosen calendar from the drop-down menu. To confirm and exit the “Timescale” window, hit “OK”.
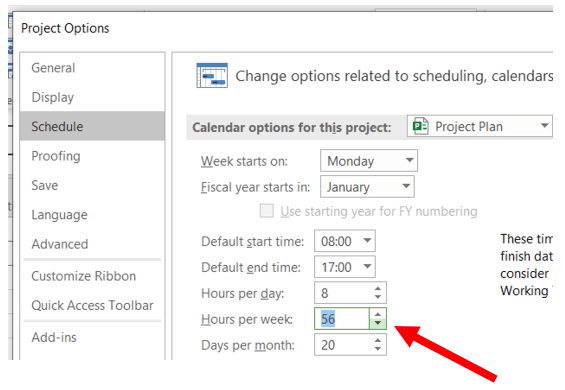
Step 12: In order to ensure Project recognizes the 7-day week’s working hours, it is important to ensure your weekly work hours are updated to 56 hours (8 hours per day, 7 days a week). To do this select File > Options > Schedule and ensure “Hours per week” is increased from 40 to 56. Press “OK” to confirm.
Does your project only require certain tasks to take place during the weekend?
It may be the case that it is not necessary for your entire project to use calendar days but instead requires the usual weekday schedule with the addition of specific tasks taking place over the weekend.
This is a common requirement of projects and therefore it is important to know how to use Project to reflect this.
There is a simple solution to ensure Project is aware of which tasks you would like to take place outside of the business’ usual working hours.
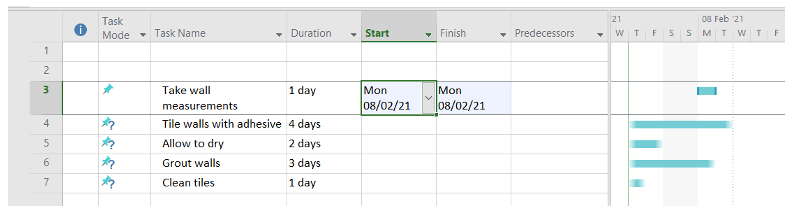
For the purpose of this guide, I am using the project example of tiling a wall. The following steps show how I ensured my required phase, “allow to dry”, to be scheduled at the weekend.
Step 1: Enter your project tasks and their durations then select your desired start date as shown below.
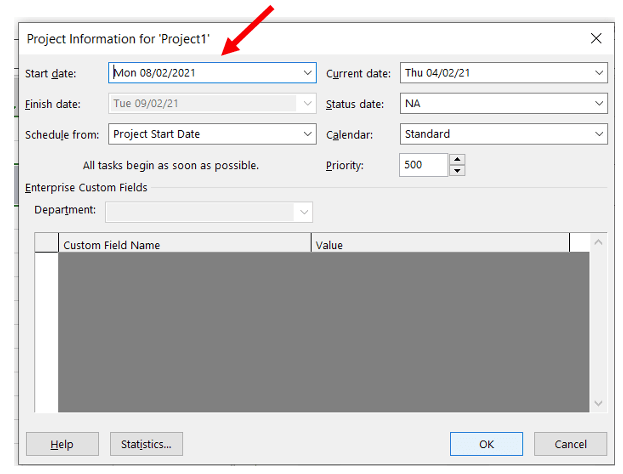
Step 2: Ensure Project is aware of your desired start date, rather than allowing it to assume your project begins on the day you open the file, by selecting Project > Project Information and inputting your desired start date. Select “OK”.
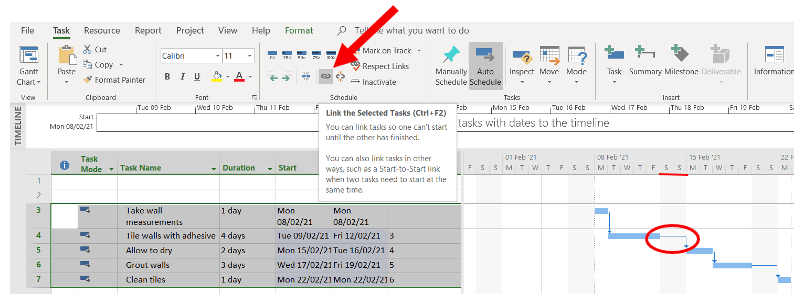
Step 3: Highlight all of your tasks and select Task > Auto Schedule in order to automatically calculate the start and finish dates of each task.

We have a separate article explaining the difference between auto and manual scheduling if you are unsure about this topic.
Step 4: While still highlighting your tasks, select Task > Link to ensure tasks are unable to begin until the previous task is complete. You will notice that the schedule does not allow for any weekend work.
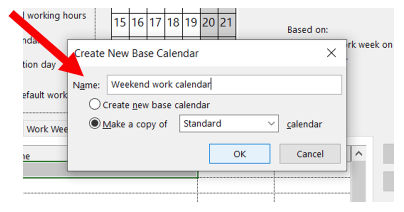
Step 5: In order to allow Project to schedule the “allow to dry” phase over the weekend we need to select Project > Change Working Time > Create New Calendar. Name your new calendar and ensure to select “Make copy of Standard calendar”. Select “OK”.
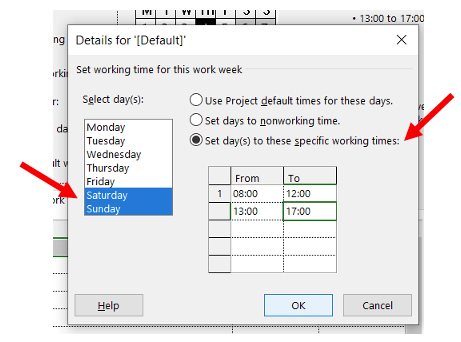
Step 6: Staying within the open window, select Work Week > Details. Select Saturday and Sunday from the table on the left and ensure you select “Set day(s) to these specific working times:”. Enter the regular weekday working hours of your project team into the table on the right to create a calendar with weekend work. Click “OK”.
Step 7: Double click on the task you would like to take place during the weekend in order to bring up the “Task Information” window and select your weekend work calendar from the Calendar drop-down menu. Select “OK”.

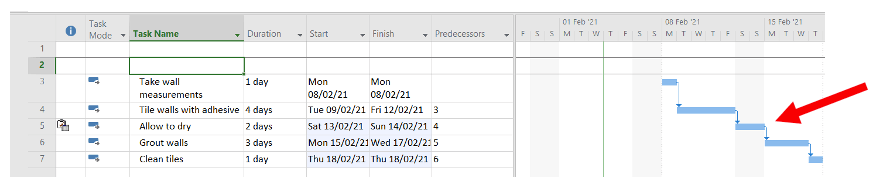
Step 8: Your project will now be scheduled as normal but with your desired tasks taking place during the weekend. Your Gantt chart will reflect these changes also, as shown below.
Regardless of the type of project you are undertaking, the same rules apply when using Project. Whether you are looking to change the number of working days in a week for the duration of your project schedule, or just allow a single task to be undertaken over the weekend, Project allows you to schedule this with ease, it is simply just a matter of knowing how.