Picture this:
It’s Monday morning, you’re sipping your first coffee of the day, and your inbox is already brimming with project updates.
As a manager or team lead, you’re constantly juggling tasks, deadlines, and, most importantly, people. You’ve heard the term ‘resource utilization’ thrown around in meetings and webinars, but what does it really mean in the hustle and bustle of your daily grind?
Well, let me break it down for you.
Think of resource utilization as your secret weapon in understanding exactly how your team is performing. Are they overworked, underutilized, or just right? It’s like having a fitness tracker, but for your team’s productivity and workload.
In this article, I’m going to guide you through the ins and outs of calculating resource utilization. We’re not just talking numbers and formulas here; we’re diving into real-world scenarios, just like the ones you face every day. From understanding the basics to applying them in practical, no-nonsense ways, I’ve got you covered.
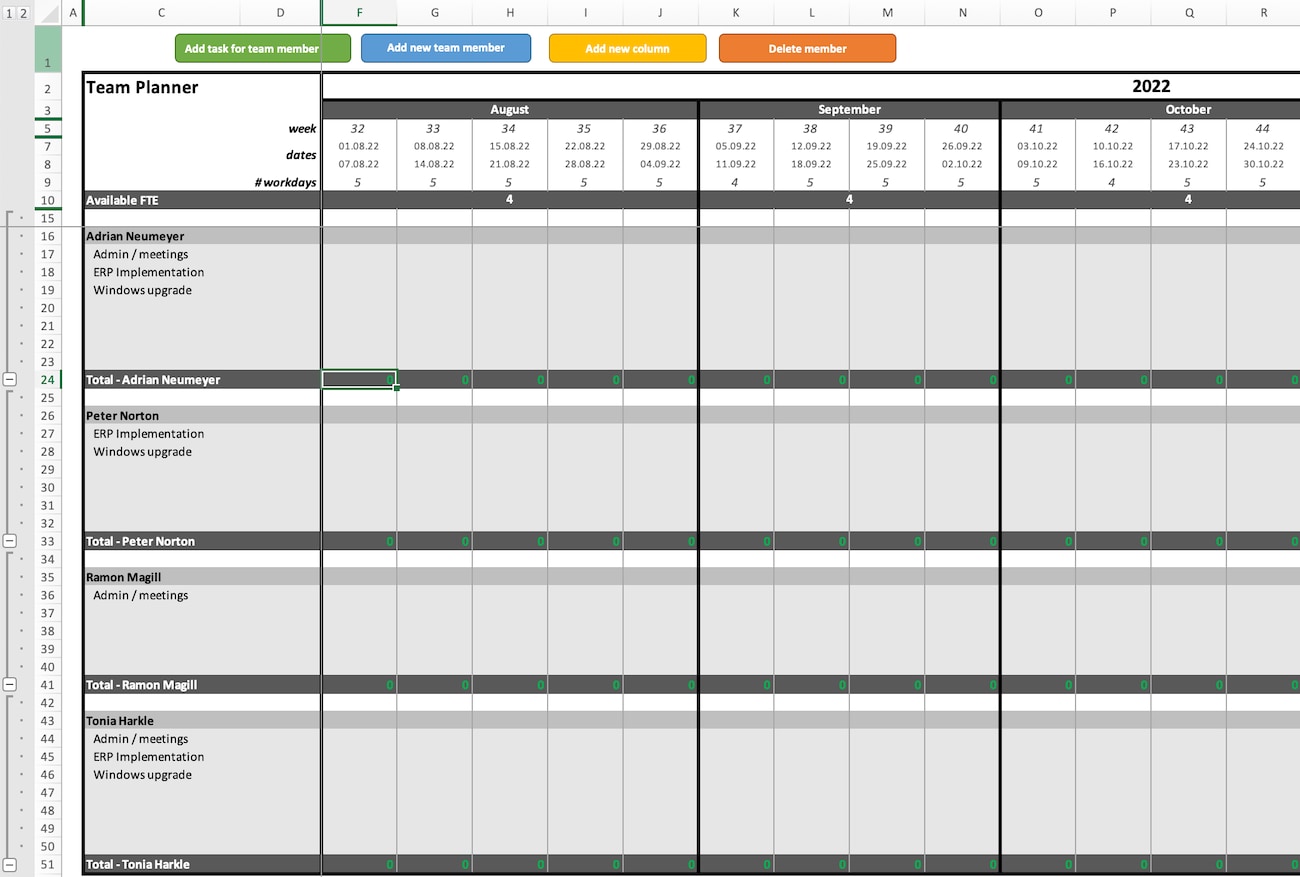
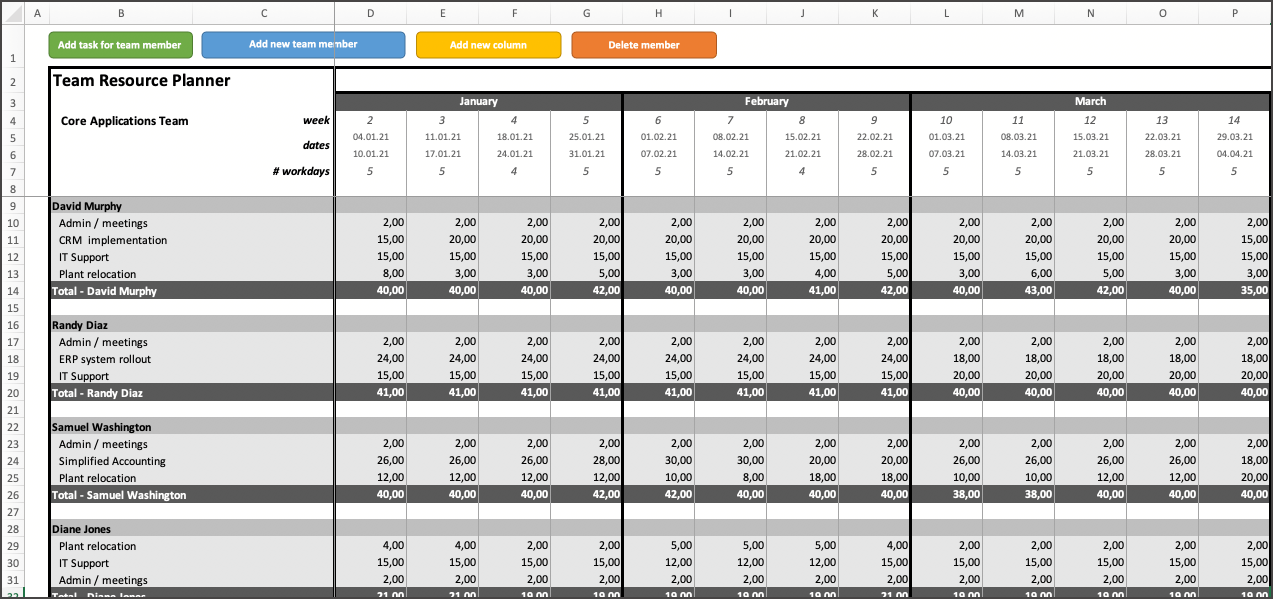
What’s more: I even have a read-to-use Excel template for you where you can quickly calculate the utilization rate for your team members on an individual basis.
My goal? To give you crystal-clear clarity on your team’s productivity.
So let’s dive right in.

What is Resource Utilization?
In simple terms, resource utilization tells you how much of your team’s available time is being spent on productive, billable work. It’s about finding that sweet spot where your team is busy enough to be productive but not so swamped that they’re on the brink of burnout.
Understanding resource utilization will give you a roadmap for managing your team. You’ll see how your team’s time is being spent today and are able to make smarter decisions about tomorrow – like figuring out when it’s time to expand your crew or pump the brakes on hiring. It’s all about aligning your team’s capacity with the long-term vision for your projects.
Calculating resource utilization: What you need
To calculate resource utilization, you need specific pieces of information about your team and the projects they are involved in.
Here’s a breakdown of the information you need to gather:
- Total Available Hours
- Planned Leaves and Absences
- Project-Specific Effort (Read my guide on estimating project workload)
- Billable Hours Worked
- Non-Billable Hours Worked
- Overtime Hours
Let me explain what’s behind each item:
Total Available Hours:
The number of working hours your team members are expected to be available during a given timeframe, usually measured in hours per week.
Most team members will be working full-time, which would be somewhere between 35-40 hours per week, depending on your country.
There may also be a few part-time workers who only work for a fraction of the week, let’s say 3 days per week (equating to 24 hours per week, assuming an 8-hour working day).
Leave and Absences:
This includes scheduled leaves, vacations, or unplanned absences that affect the availability of team members. Start by getting the public holidays for your state.
Next, review your company’s closing calendar for the year, which may cover time off due to company-wide retreats or mandatory shutdown periods. Leaves and absences will reduce the total available hours for the respective period.
A good site to get the public holidays for your area is https://www.officeholidays.com/.
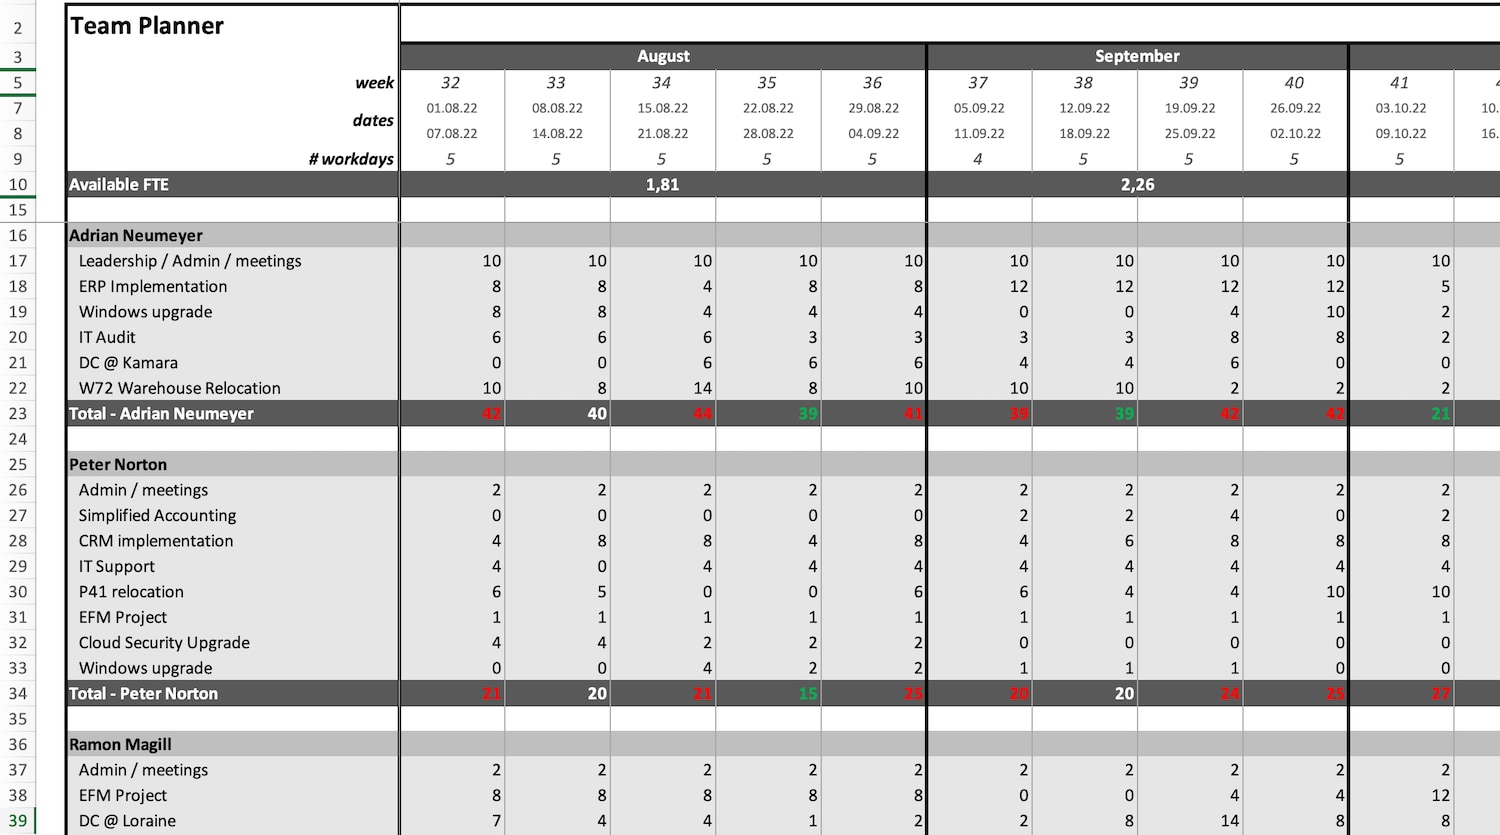
Project-Specific Information:
Get a detailed breakdown of project tasks and the estimated hours allocated for each task. To be able to calculate the expected utilization rate for a specific period, you also need to know what week or month each task is scheduled for.