Are you leading global projects that consist of international teams? Are you feeling overwhelmed on how to schedule tasks that don’t get in the way of their holidays?
Did you answer YES to these questions? If so, then this guide is what you are looking for!
It will help you to meet your project deadlines in a more efficient way.
There are so many reasons why a project would fall behind schedule, especially if managing people that work from different locations. So, creating a resource calendar can help you in creating a project schedule that takes into consideration the local holidays of each team member.
Let me take you through a step-by-step guide on how to create a multinational resource calendar in Microsoft Project (click for our other guides).
The Example
I will use this example to show you how to create a resource calendar. It is a simple example to follow, and it will help you to create your own (even more complex) scenarios!
It is an IT project which aims to develop a website that promotes bank services to customers. The project consists of tasks that are assigned to two team members, who work from different locations (in this case, Alex works in the UK and João works in Portugal). However, on 25 May 2021, it is a Bank holiday in the UK and Alex will expect to spend it with his family. At the same time, on 10 June 2021, it is Portugal National Day, and João is definitely looking forward to it rather than being at work.
Step 1: Create a new project
Create a new project and include the Task Name, the Start date, and the Finish date of each task.
I have set the following tasks in my example:
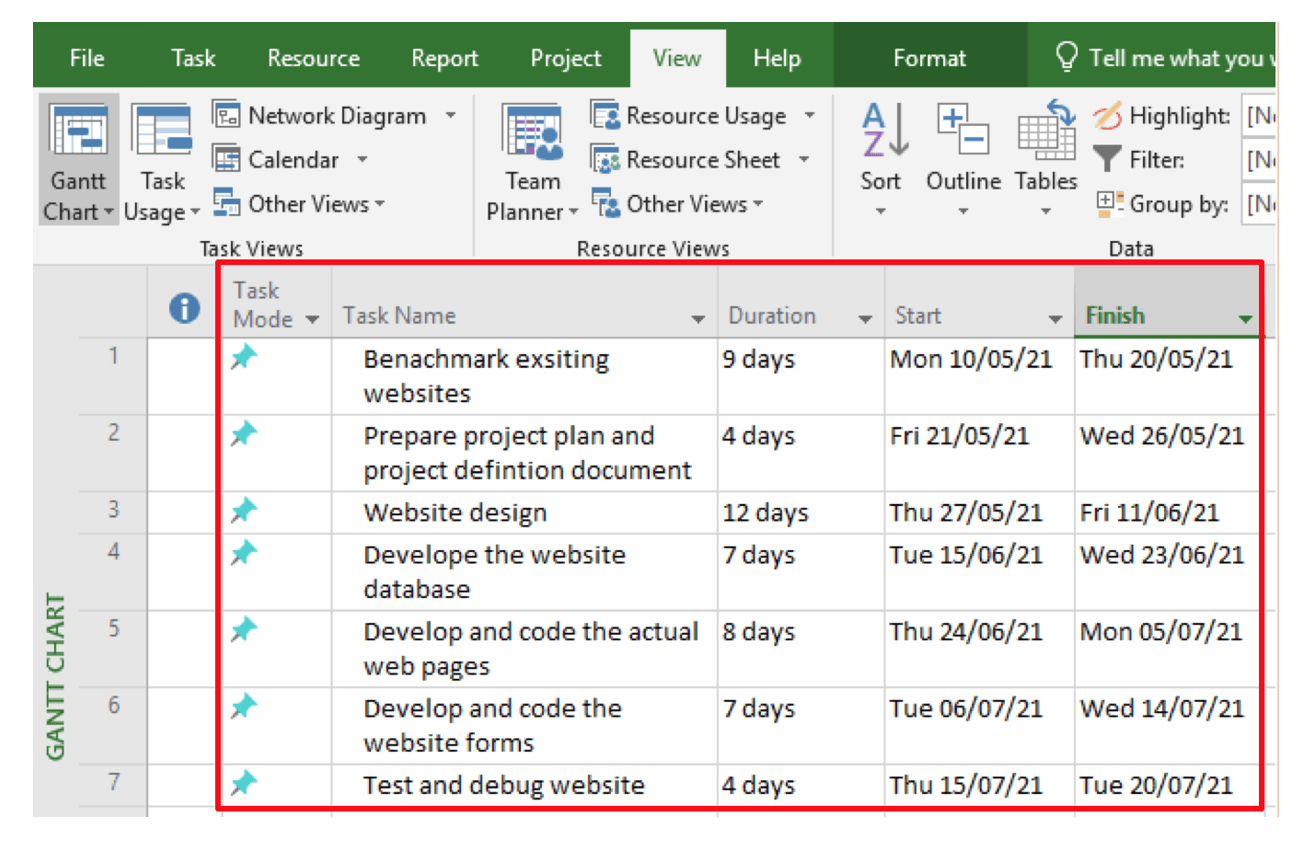
You must have an understanding of all the tasks that have to be completed in your project, their durations, and all of the available resources. That will guarantee you more accuracy in your resource scheduling.
Step 2: Create new calendars
To create a new calendar:
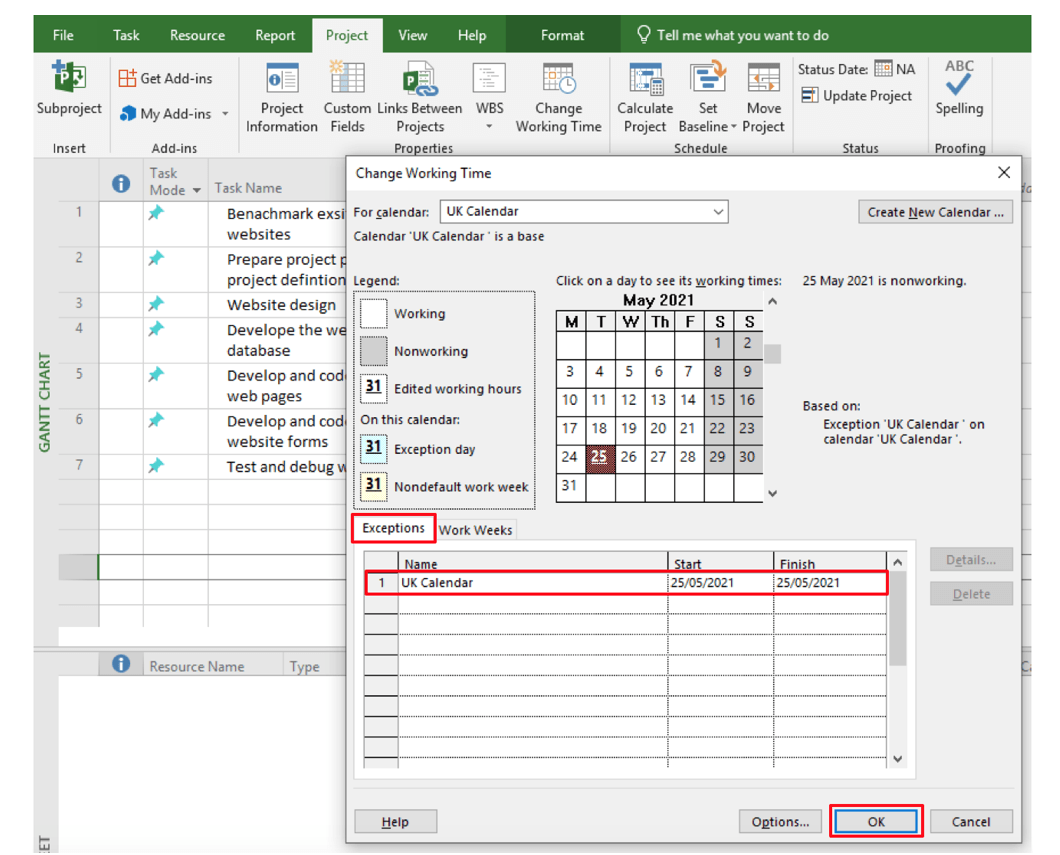
Click on Project → Change Working Time → Create New Calendar
Now, give your first calendar a Name. I set “UK Calendar” as a Name in my example.
Press OK.
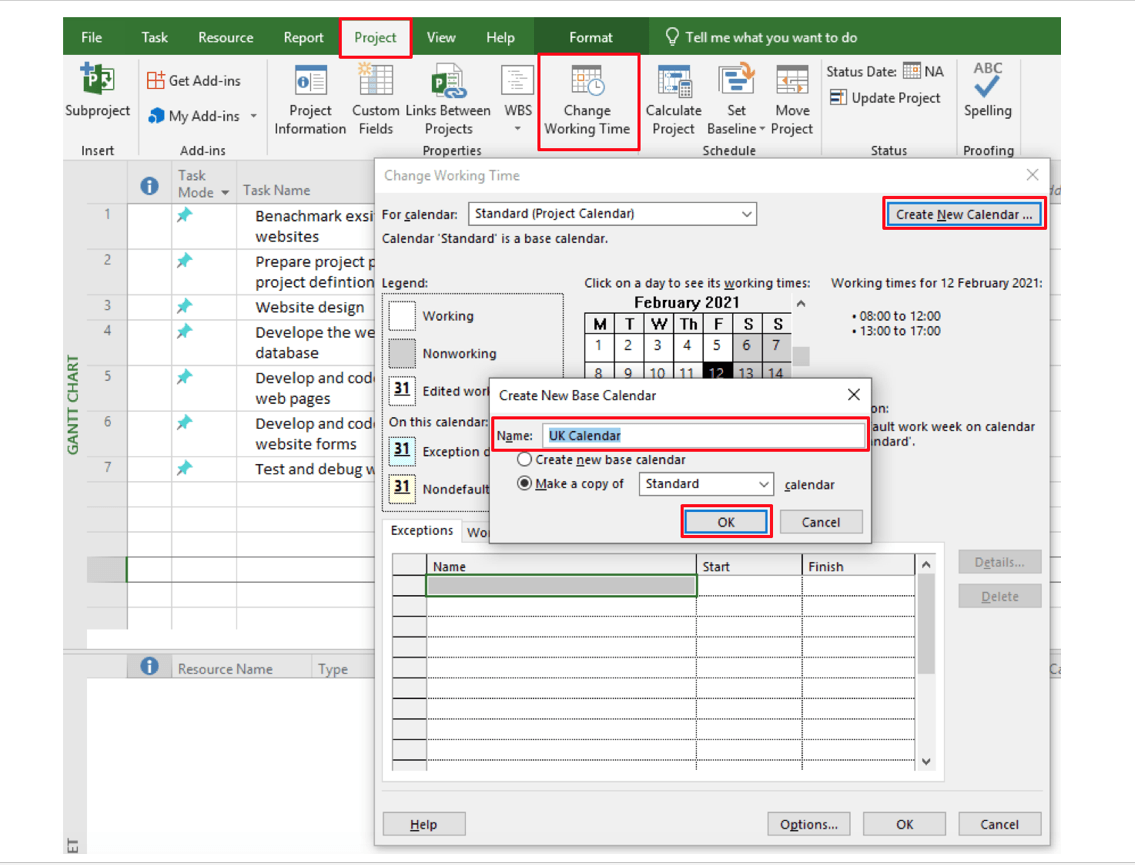
In the following window, Click on the Exception tab and insert the names and the dates of the holidays
Press OK.
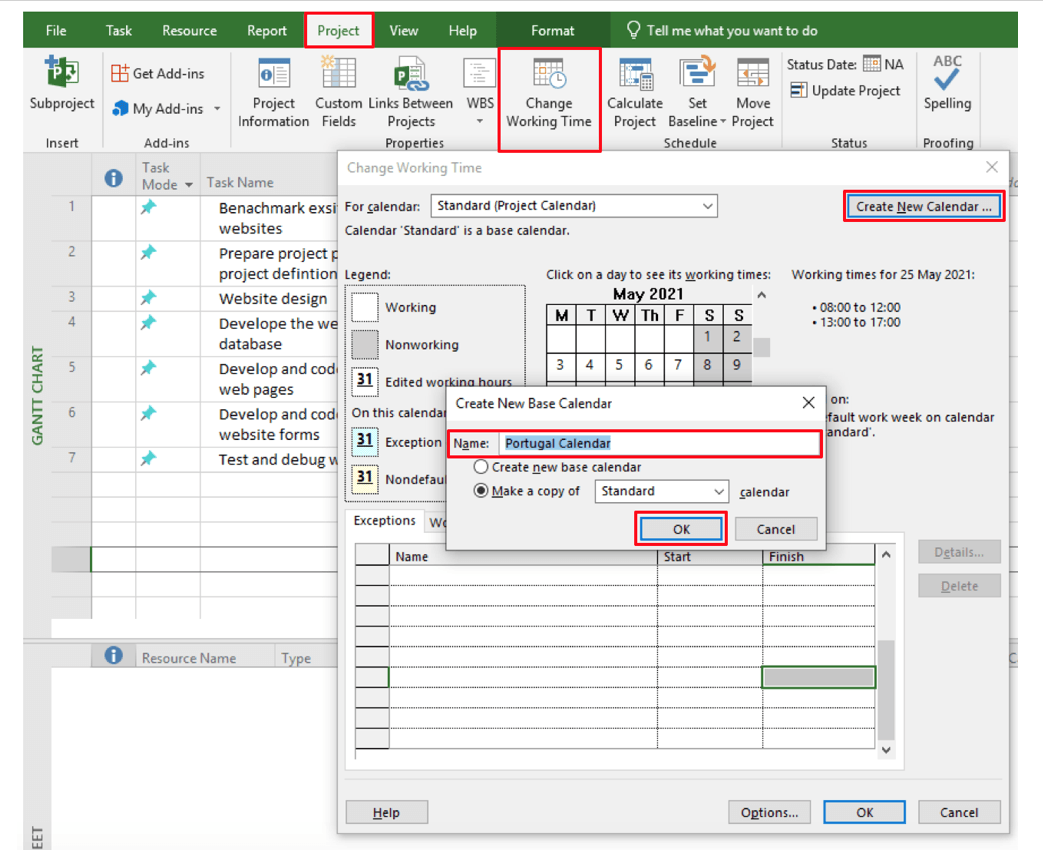
Now, let’s do the same process for João’s holiday
Create another calendar following the same steps:
Click on Project → Change Working Time → Create New Calendar
Now, give your second calendar a Name. I set “Portugal Calendar” as a Name in my example.
Press OK.
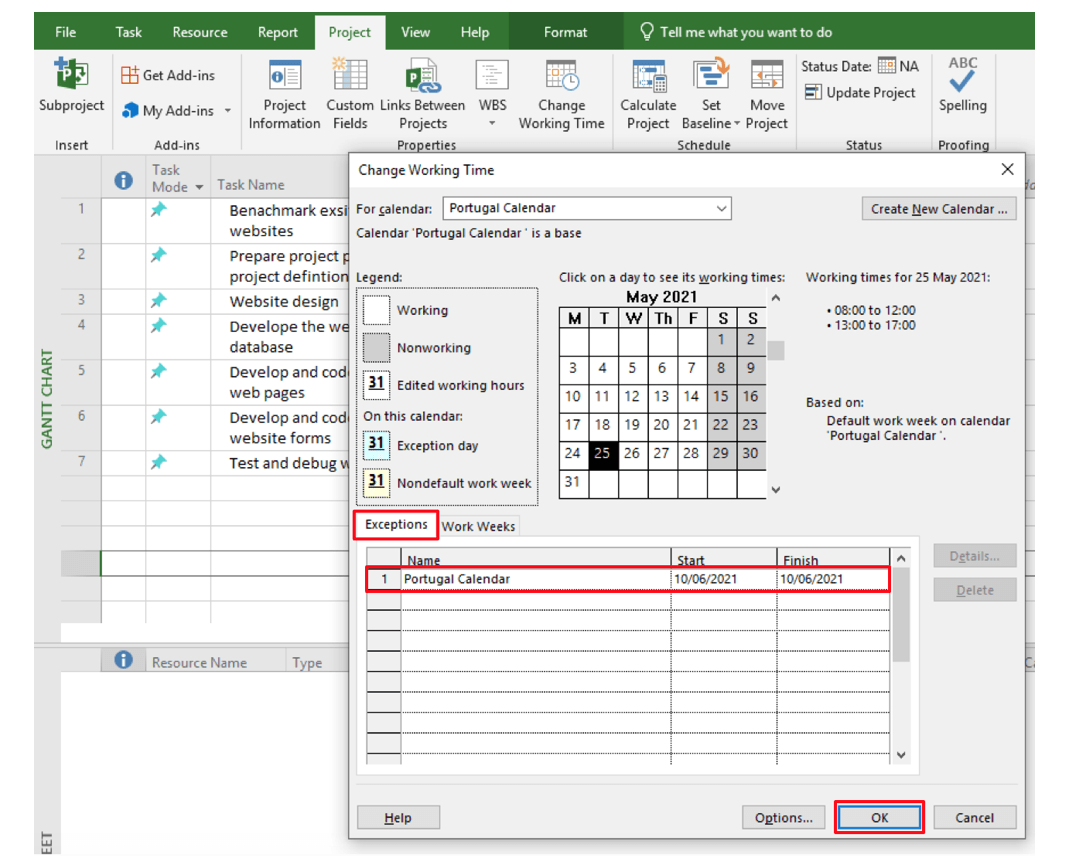
Again, Click on the Exception tab and insert the names and the dates of the holidays
Press OK.
Understood the pattern? Now, if you want to add more calendars, just follow the exact same steps again. However, I only needed to create two calendars based on the example.
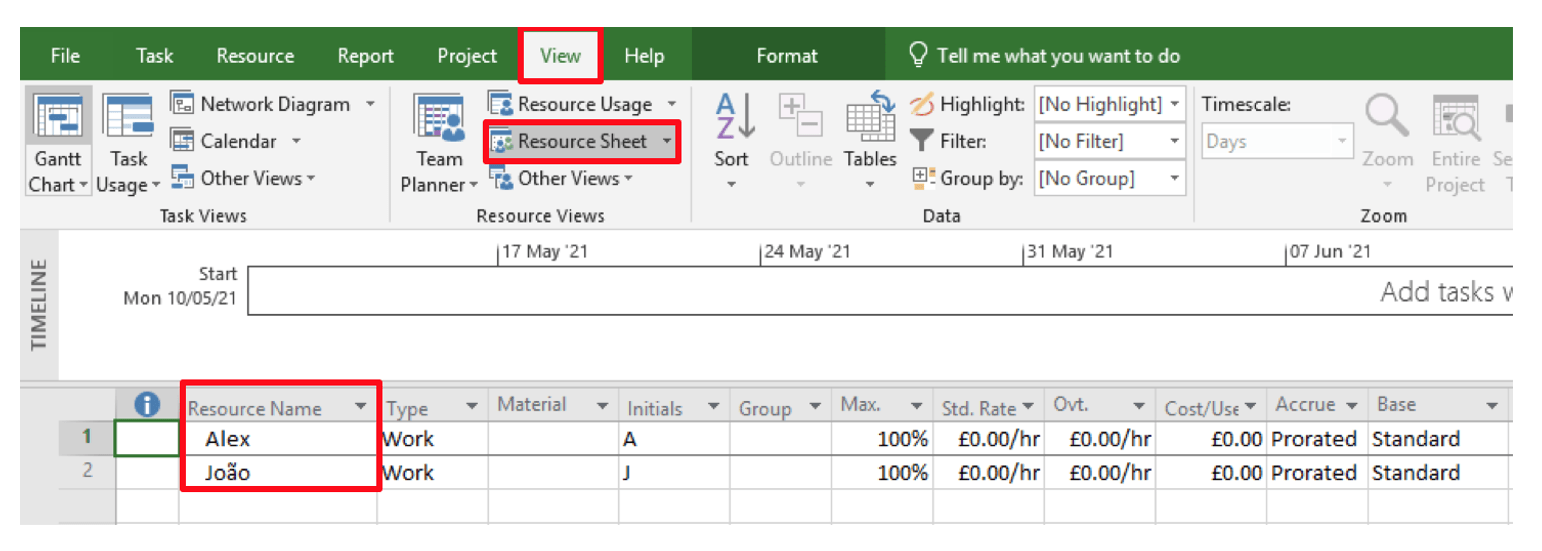
Step 3: Maintain Resource Sheet
The two calendars are set up successfully. Now, maintain the Resource Sheet in order to assign each resource to their base calendar.
Create two resources:
Go to View → Resource Sheet → Add names under Resource Name:
Assign the two resources to their base calendars:
As you see in the image below, the base calendar for Alex is to be selected as the UK Calendar.

Do the same for your other resources. You can see below the final resource sheet with each team member assigned to their relevant calendar.

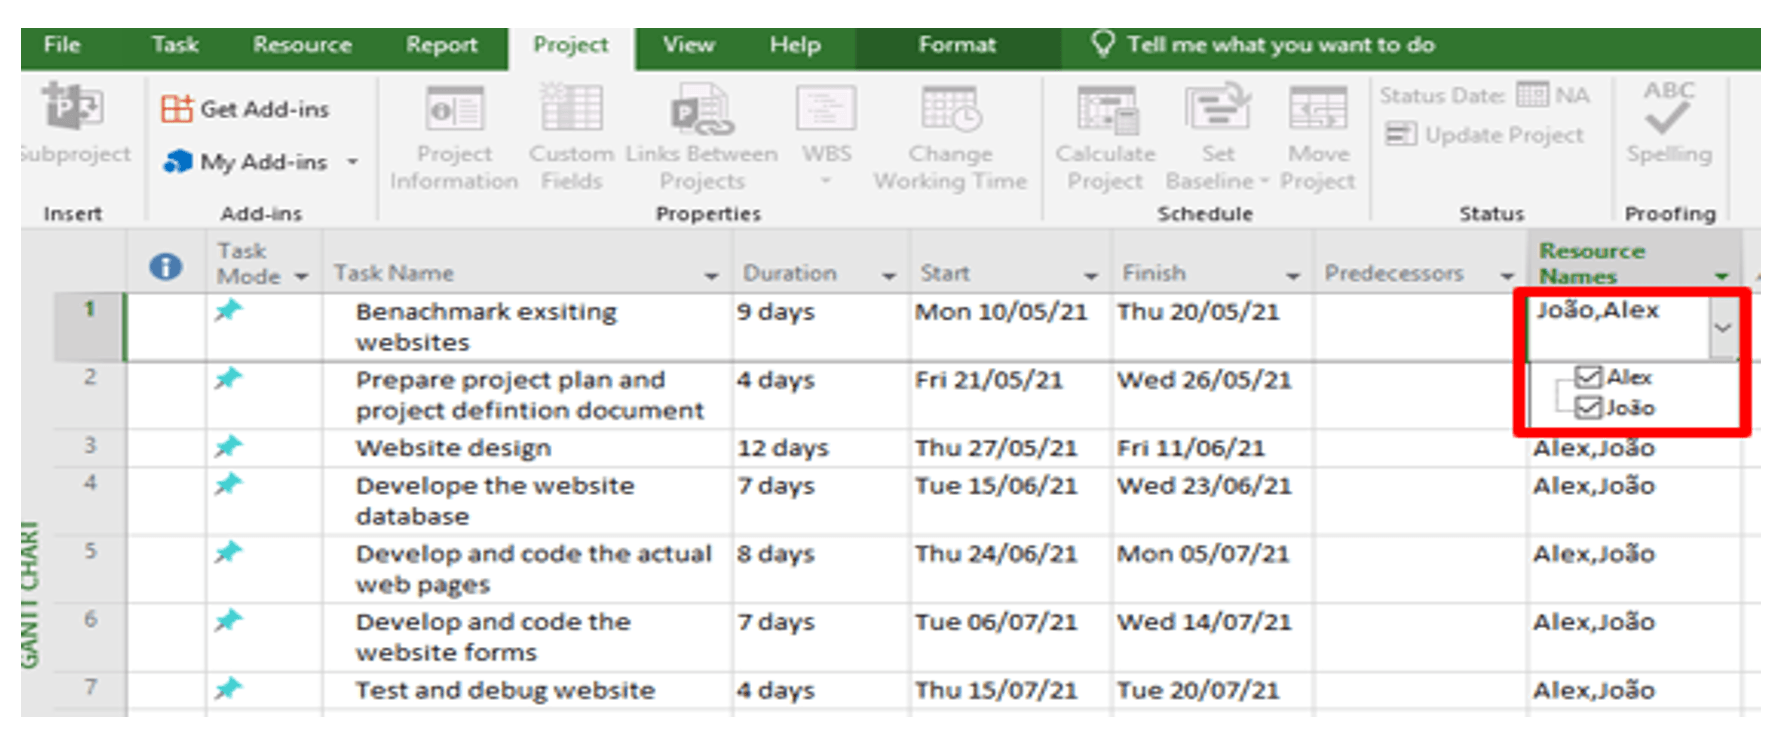
Step 4: Assign tasks to resources
Click the arrow under Resource Names, and pick the people who need to work on each task.
In my case, I assigned both resources to all of the tasks.
Step 5: View task usage
To check the working hours and the working dates for each person:
Go to View Bar → Task Usage Button
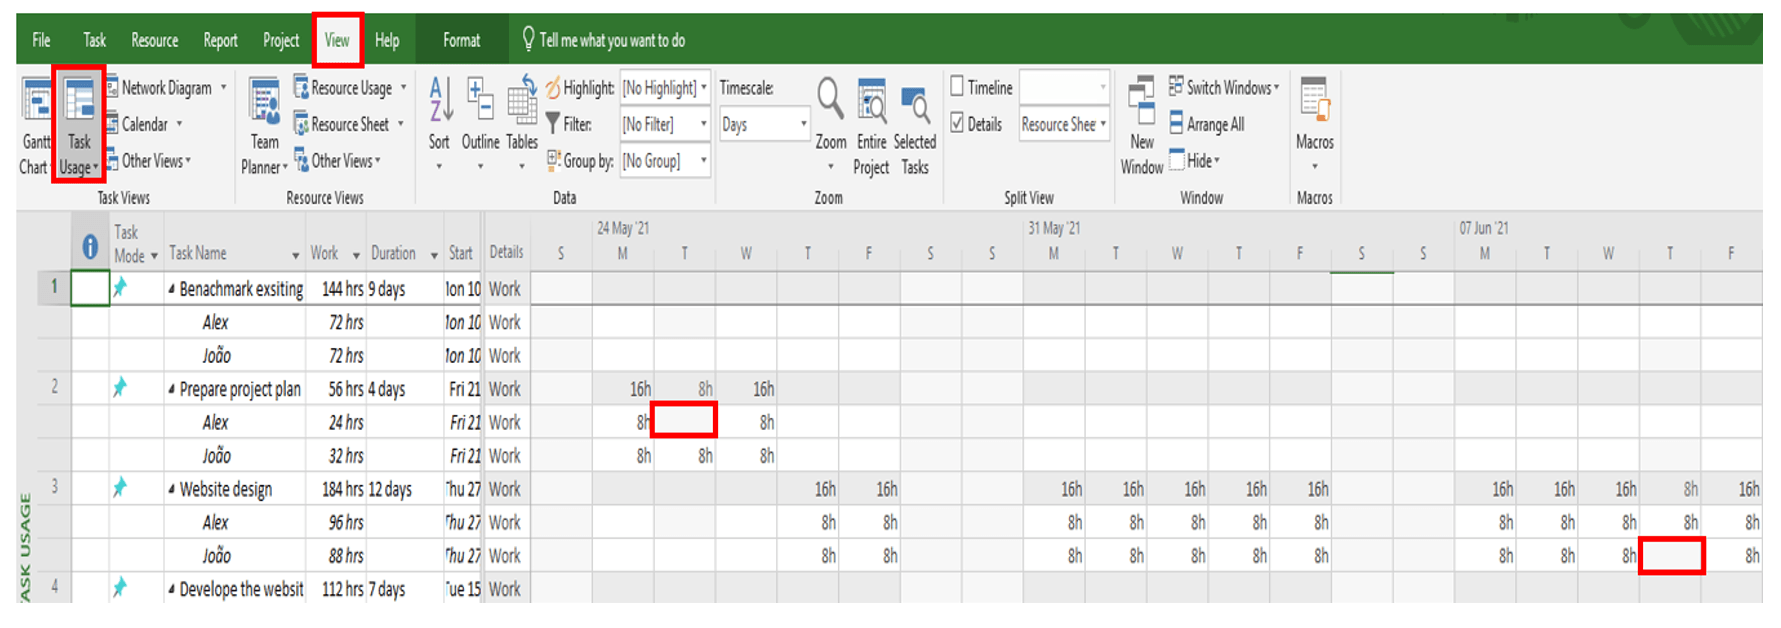
As you can see, Alex will be working based on the British holidays and João will be working based on the Portuguese holidays.
They will be working equal hours but according to their own local calendar and availability.
Summary
This was a straightforward example, right?
But just in case you got lost somewhere in the process, let’s recap!
In order to make sure that the multinational calendar is done correctly on Microsoft Project, ensure that you followed all of the key steps:
- Create a new project and include all of its required tasks.
- Create as many new calendars as needed in your project, including all of your team holiday dates.
- Create a recourse sheet and manually select the base calendar for each resource.
- Assign your recourse to their tasks.
- View task usage to see a review of the process in order to ensure that all that you have done is correct.
[optin-monster slug=”hg7qhsjfpooxzwnywg6e”]