Travel is an essential part of many projects, and very often, travel costs can be a significant portion of the total budget. Therefore, we need a way to estimate travel costs and track actual expenses. In this article I’ll show you how travel costs are handled in Microsoft Project.
Travel costs must be set up as cost resources
One of the things you have to understand about MS Project is the concept of resources. Resources are any items your project is going to use or consume.
Resources are first and foremost your team members. But you can also have material resources for any physical material that is going to be used in the process.
And finally, MS Project has so-called cost resources. Cost resources are simply “cost collectors” that you can plan or book expenses against. And for travel costs, we will use such cost resources.
Create a travel cost resource
In our simple example, I will just create one cost resource for project-related travel which we will use to plan and track travel costs. You could also create separate cost resources for accommodation, transportation, food and so on. It depends on the level of detail you need.
Go to the Resource Sheet and create a new cost resource. We’ll call it TravelCostResource:
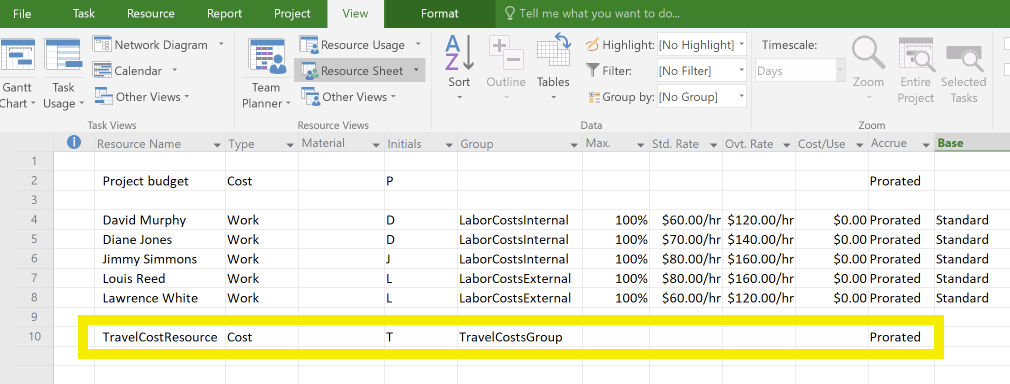
Make sure you set the Type to “Cost” because it should be a cost resource and not a regular “Work” resource.
When are we going to travel? Assigning travel cost resources to tasks which involve travelling
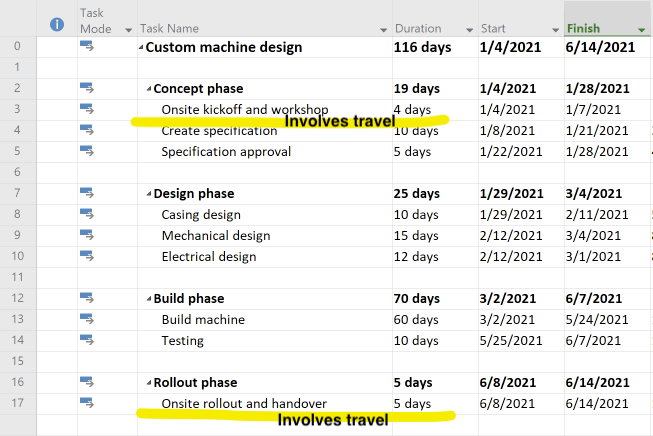
In this fictitious project we are building a machine for our client. The project has three key phases, two of which involve travel.
In January we’ll be meeting the client at his office for a 4-day kickoff and workshop. Then our engineer will be onsite during the rollout (5 days in June).
To show the estimated travel costs in our schedule, we need to assign the travel cost resource (TravelCostResource) to the tasks which involve traveling.
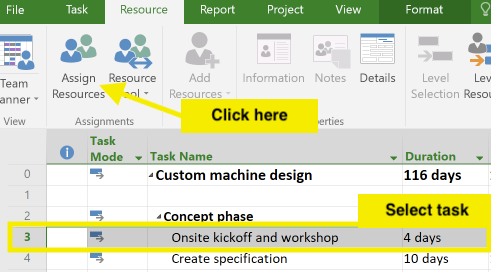
To assign the resource, select the task and choose Assign Resources from the menu:
In the following dialog, enter the estimated travel cost for the specific task and press Assign. Then close the window.
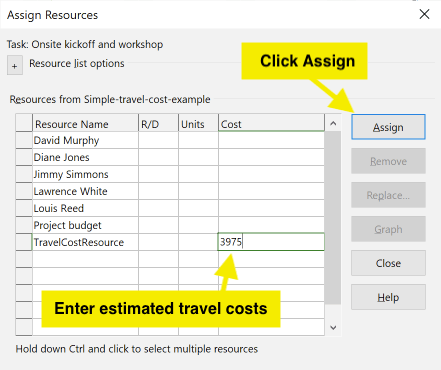
In this case, we estimated travel expenses for the onsite workshop at $3975. This includes airfare, accommodation and food.
Repeat the same steps for all the other tasks which involve traveling.
Now your project costs also include travel expenses.
Show travel costs in the cost report
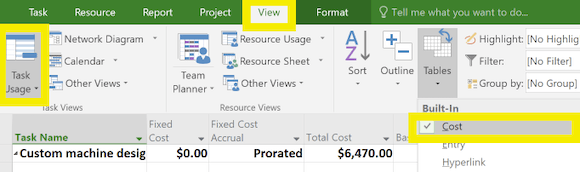
You can see the travel costs in the cost report of MS Project. Just go to View → Task Usage → Tables → Costs:
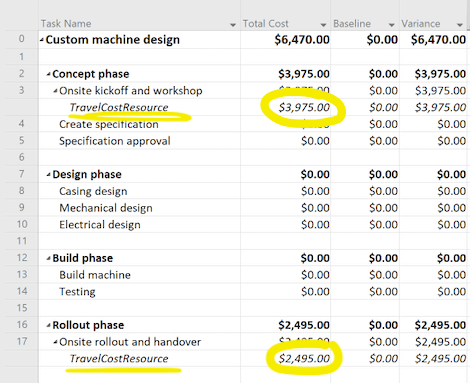
The travel costs for the two trips now show up in the cost report. They are assigned to our TravelCostResource resource 🙂
Tracking real travel costs
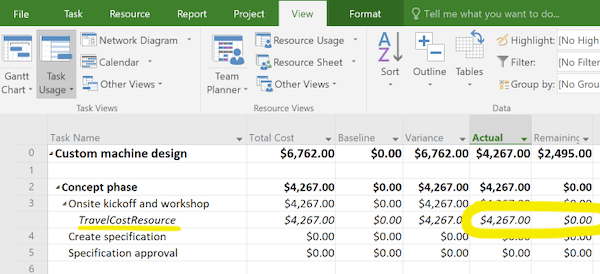
So far we only included the projected travel costs, which we would typically save in the baseline of our original project schedule. Let’s now record the actual expenses we have incurred.
For our first business trip, attending the workshop, we estimated $3,975. But eventually we ended up paying much for our flight tickets, so in total we spent $4,267 in travel costs.
To add the real expenses, go to the Task Usage sheet and set the Actual Costs to the final amount and Remaining costs column to zero:
Don’t forget to create a project budget
I highly recommend setting up a project budget which includes travel. This makes cost tracking much easier. You can even set up a dedicated budget for travel only, so that you can compare exactly planned vs. actual travel costs.
Do you want to learn how to set up budgets in Microsoft Project?
Check out my e-book, The 80/20 Guide To Microsoft Project where I show go through the steps using real-life examples.