You are leading a project for an industry that is asking you to use its own Work Breakdown Structure (WBS) numbering schema. What a headache, right? But don’t worry, we got you.
Did you know that Microsoft Project(click for our other guides) gives you the option to customize the WBS numbering according to your chosen project codes? Yes, believe me, it is very flexible software. More than that, it also allows you to use a variety of numbers, letters, and symbols that you can include in your project code.
Let me show you how you can do that in this tutorial. I promise you this is a very easy one!
[optin-monster slug=”td0nueiadsft7jwtyt8a”]
Step 1: Create WBS for your project
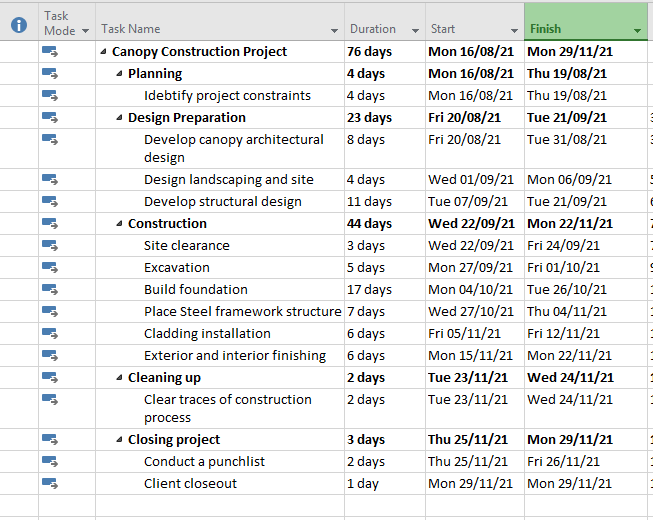
Enter the tasks that you want to include in your WBS.
In my example, the project is about constructing a canopy, and I have added all of the major tasks and the subtasks that need to be included in the project. Check the image below:
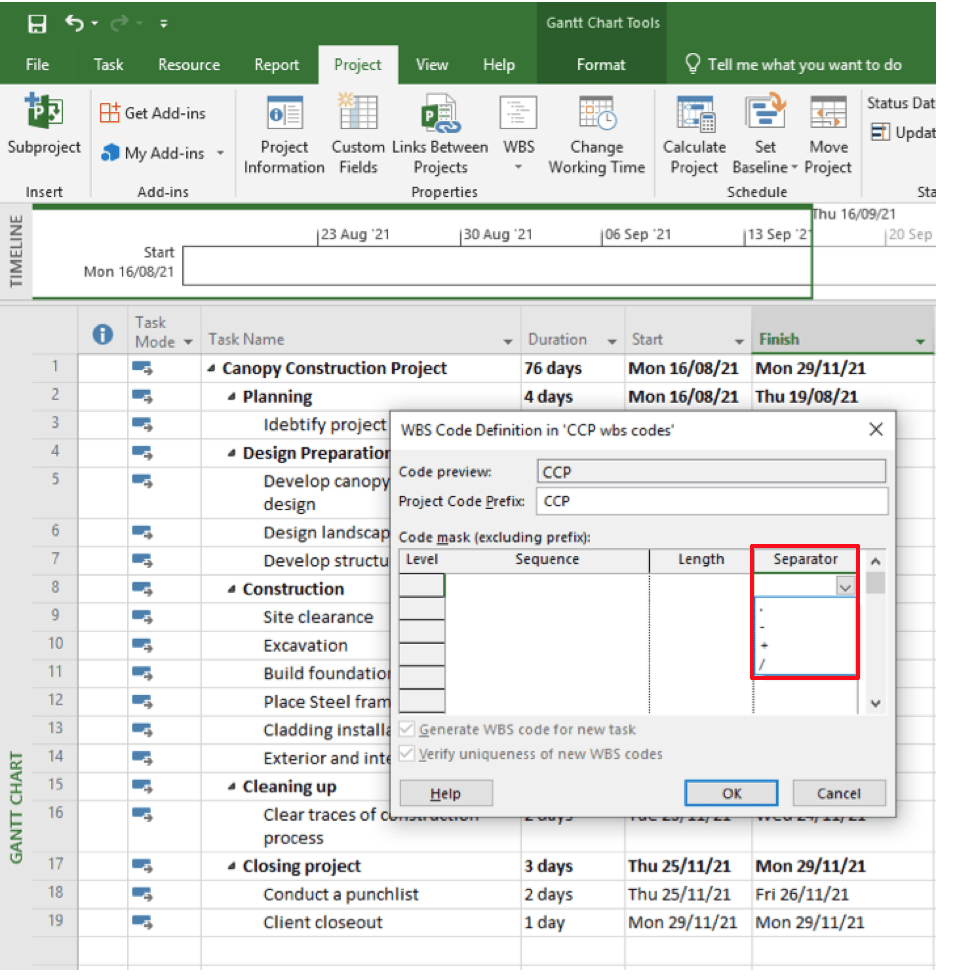
Step 2: Define code
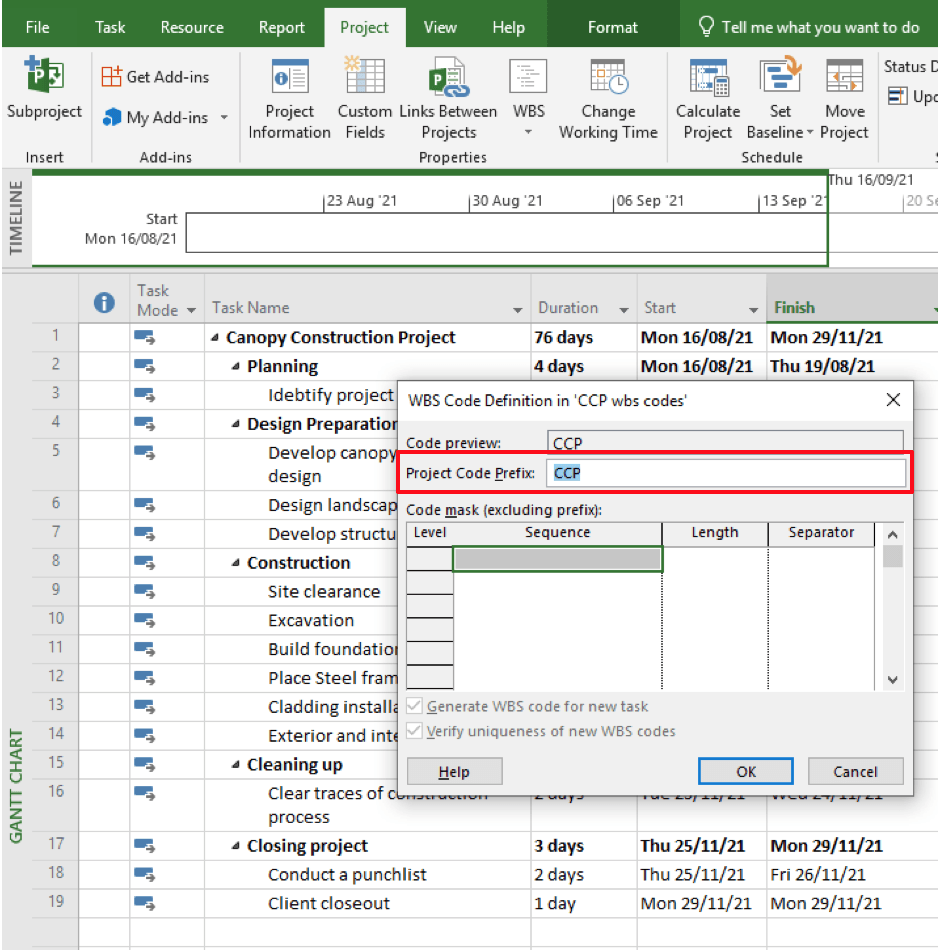
Using the ribbon tabs, press Project → WBS → Define code
In the WBS Code Definition box:
Go to Project code prefix and insert the code that is required by your company for the project.
In my case, I chose CCP which is an abbreviation for (Canopy Construction Projects) as required by the construction company.
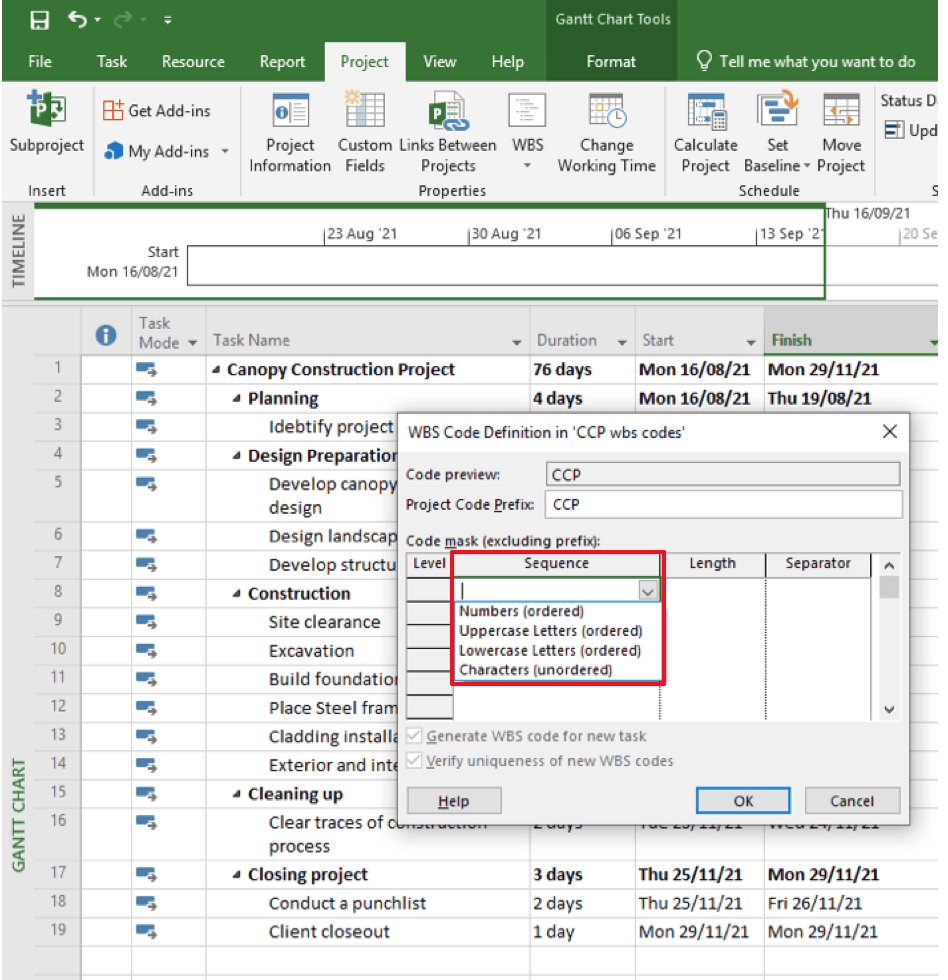
Now, choose a sequence from the drop-down list
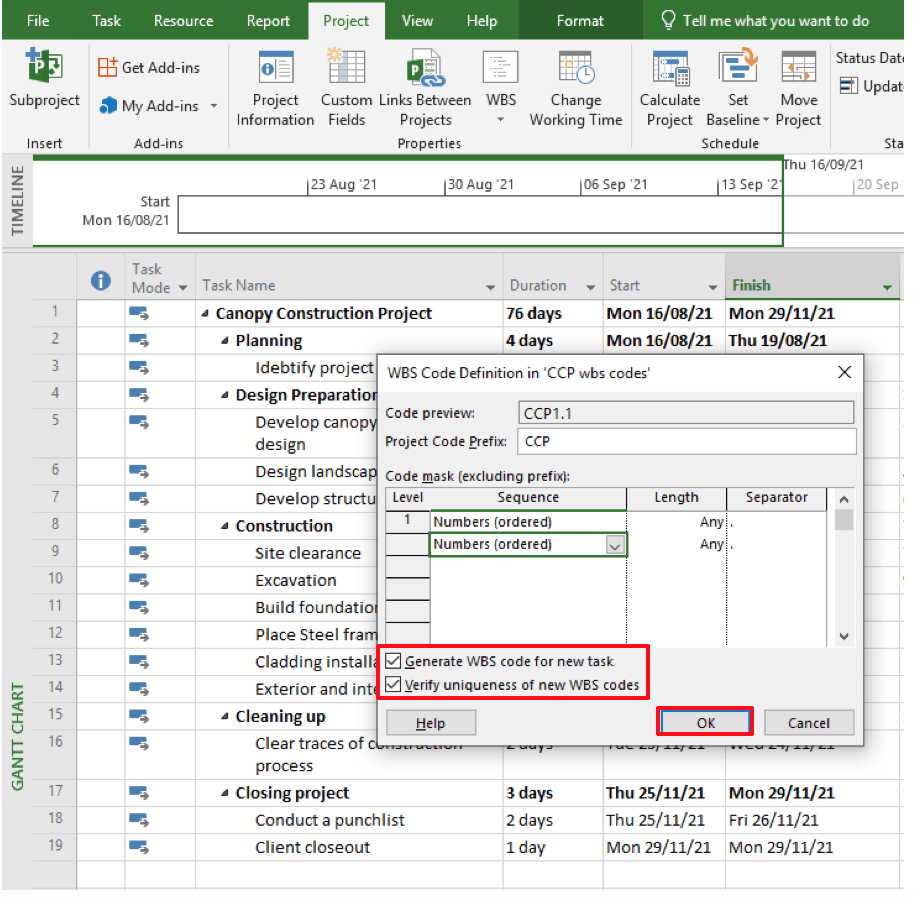
You are free to choose the nature of the code you wish to create. As you can see, you have a range of choices. In my example, I chose numbers for all the WBS levels.
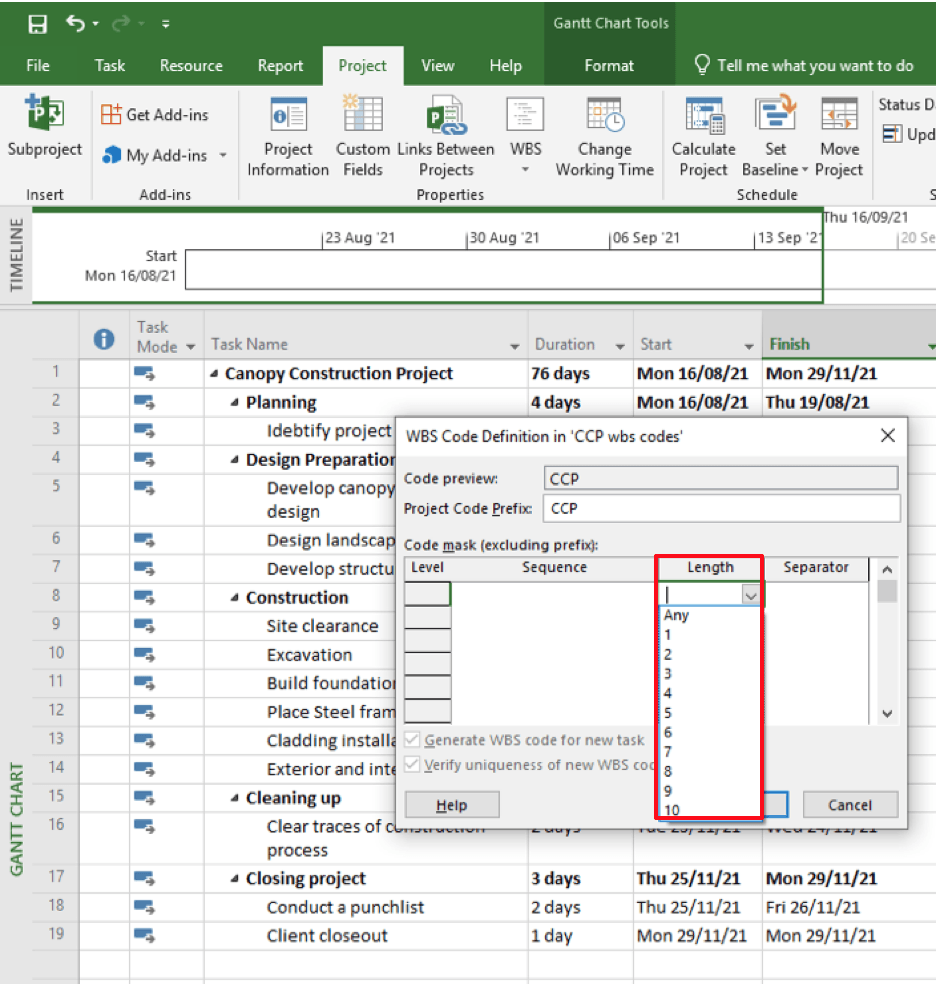
In the length column, pick how many characters you wish to add for each level of your code.
In the separator column, pick how you would like to separate the code from one level to another
You can see what I chose for the levels of the project in my example below:
Pay attention to the check boxes in the window:
Tick Generate WBS code for new task, only if you would like MS Project to generate new codes for any more tasks you add.
Tick Verify uniqueness of new WBS codes only if you would like MS Project to verify any unique code that you manually enter in your WBS.
Press OK.
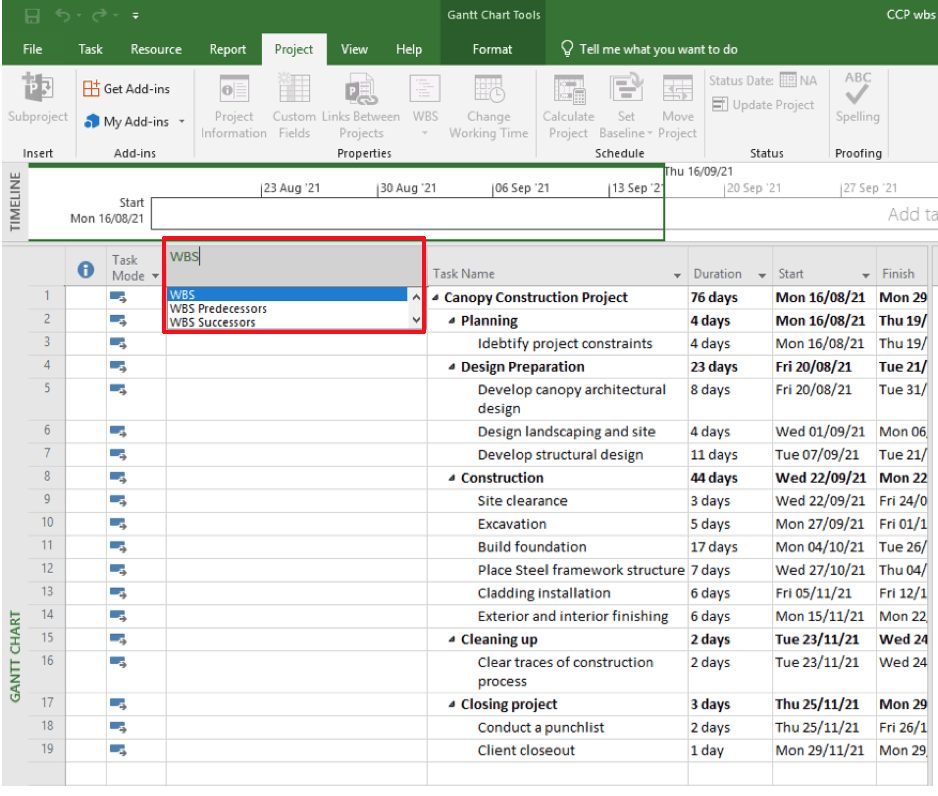
Step 3: Insert WBS column
Right-click on the task name and click insert column
Type “wbs” then press enter to insert the WBS column
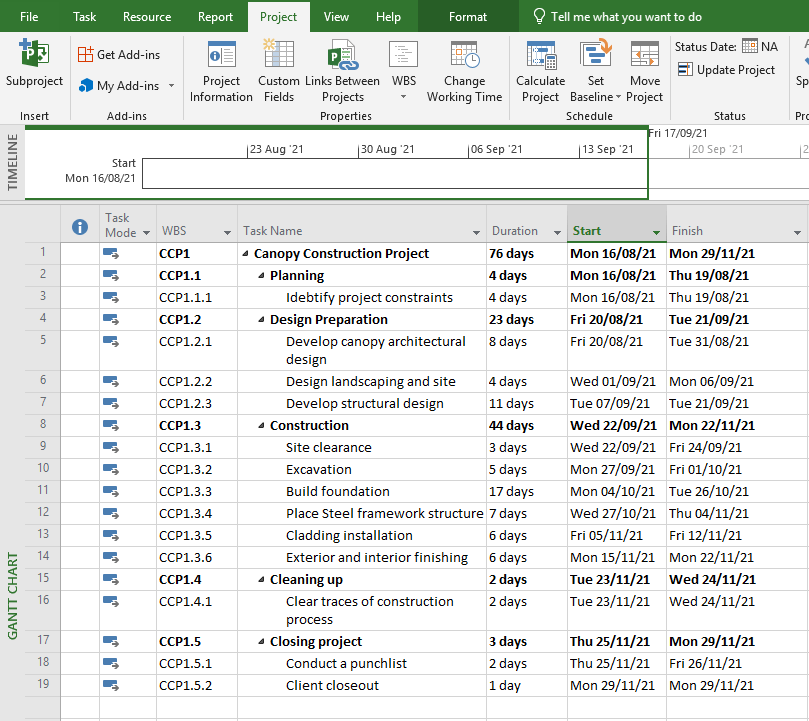
That is all done! easy-peasy, right?
Here, you can see the final costume WBS codes that are generated for my Canopy Construction Project!
Summary
Once you have set your WBS, you can create Custom WBS codes for the tasks in a project that match the requirements for your company. You just need to define the code and make sure to fill in the following elements:
Project code prefix
Sequence
Length
Separator
The final important step, do not forget to insert a WBS column, otherwise, you won’t see the project codes!
Hi, I’m Adrian, a Senior Project Manager and the Creator of Tactical Project Manager, where I teach a pragmatic approach to project management. Led large-scale IT and business projects for over 10 years. My goal is to enable you to lead any project with confidence.
Shaped by feedback from 40+ technical managers who plan projects every day.
Finally, get a handle on team capacity planning!
Many of you have told me: “I have NO GOOD WAY to manage resource allocation” I could not let that sit. So, I locked myself into my basement for 6 months to build the SIMPLEST Resource Planner out there. It gives you instant visibility on workload and team availability.